Tkinter introduction
From docs.python: Graphical User Interfaces with Tk:
Tk/Tcl has long been an integral part of Python. It provides a robust and platform independent windowing toolkit, that is available to Python programmers using the tkinter package
tkinter is a set of wrappers that implement the Tk widgets as Python classes
In this section, you'll see examples for the Button, Label and Radiobutton widgets. You'll also learn how to customize some of the widget parameters and use a Frame for organizing your widgets.
Did you know? The GUI applications IDLE and Thonny IDE were built using the
tkintermodule.
Built-in example
If you invoke the tkinter module from the command line, a sample GUI will be presented.
$ python3.13 -m tkinter
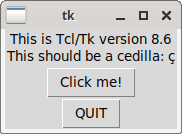
You can resize the window if you want to:
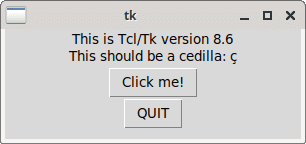
Go ahead, click the buttons and see what happens!
A single Button example
Here's a small program to get started with coding a GUI using tkinter:
# button.py
import tkinter as tk
def button_click():
print('Button clicked!')
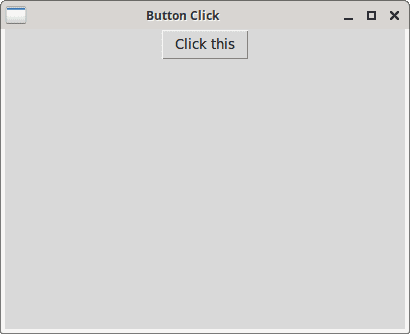
root = tk.Tk()
root.title('Button Click')
root.geometry('400x300')
button = tk.Button(text='Click this', command=button_click)
button.pack()
root.mainloop()
The main window is usually named as root. The title() method lets you set a name for the window (default is tk as seen in the previous example). The geometry() method accepts the window dimensions of the form widthxheight+x+y where x and y are co-ordinates. Leaving out x and y will usually place the window at the center of your screen.
The tk.Button() method helps you create a button. The command parameter lets you define the action to be taken when that particular button is clicked. In this example, the function simply prints something to your normal stdout screen.
$ python3.13 button.py
Button clicked!
Button clicked!
After creating the button, you can use methods like pack() and grid() to control its placement. More details will be discussed later.
The mainloop() method is the preferred way to block the Python program from exiting (as an exercise, check what happens if you don't have this line). The user can then interact with the window as needed. Note that this example doesn't explicitly provide a widget to exit the window. Depending on your OS and desktop environment, you can use the window close options (usually on the top left and/or top right).
commandparameter.lambdais also helpful if the function to be called requires arguments.
mainloop()method.
Adding a Label
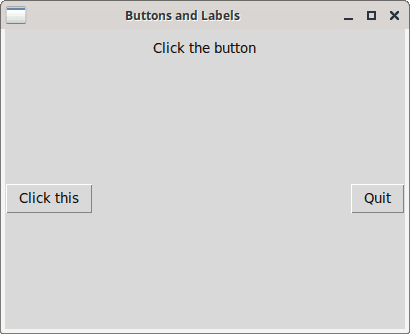
The below program extends the previous example by adding two more widgets:
- a Label widget to display information
- a Button widget to exit the application
# buttons_and_labels.py
import tkinter as tk

def button_click():
    label['text'] = 'Button clicked!'
    label['fg'] = 'blue'

def quit_program():
    root.destroy()

root = tk.Tk()
root.title('Buttons and Labels')
root.geometry('400x300')

label = tk.Label(text='Click the button', pady=10)
label.pack()

button = tk.Button(text='Click this', command=button_click)
button.pack(side=tk.LEFT)

quit = tk.Button(text='Quit', command=quit_program)
quit.pack(side=tk.RIGHT)

root.mainloop()
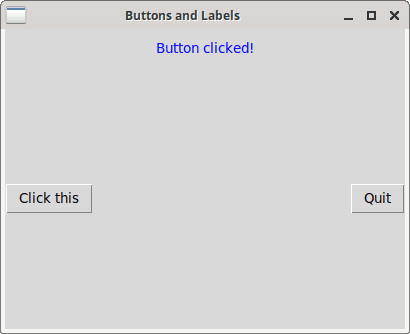
The two buttons are placed next to each other by using the side parameter. By default, they would have been stacked vertically (as is the case here for the Label widget). As seen in the screenshot below, the layout is bad though. You'll see how using a Frame helps in a later example.
You can change the parameters similar to using dict keys on the variable that points to the widget object. The fg parameter controls the foreground color. The pady parameter controls the vertical spacing around the widget.
The destroy() method can be called on any widget, including the main window. In addition to the quit button, the user can still use window close options mentioned earlier. See this stackoverflow thread if you want to handle those window close events yourself.
But first, this program will be re-written using a class instead of using functions and global variables. A GUI program usually requires widgets to refer to each other, which gets difficult to handle without using classes.
# class_example.py
import tkinter as tk

class Root(tk.Tk):
    def __init__(self):
        super().__init__()

        self.title('Buttons and Labels')
        self.geometry('400x300')

        self.label = tk.Label(text='Click the button', pady=10)
        self.label.pack()

        self.button = tk.Button(text='Click this', command=self.button_click)
        self.button.pack(side=tk.LEFT)

        self.quit = tk.Button(text='Quit', command=self.quit_program)
        self.quit.pack(side=tk.RIGHT)

    def button_click(self):
        self.label['text'] = 'Button clicked!'
        self.label['fg'] = 'blue'

    def quit_program(self):
        self.destroy()

root = Root()
root.mainloop()
Frame
To improve the layout of the previous example, here's a modified version with Frame:
# frames.py
import tkinter as tk

class Root(tk.Tk):
    def __init__(self):
        super().__init__()

        self.title('Frames')
        self.geometry('400x300')

        self.frame = tk.Frame()
        self.frame.pack(expand=True)

        self.label = tk.Label(self.frame, text='Click the button', pady=10)
        self.label.pack()

        self.button = tk.Button(self.frame, text='Click this',
                                command=self.button_click)
        self.button.pack(side=tk.LEFT)

        self.quit = tk.Button(self.frame, text='Quit',
                              command=self.quit_program)
        self.quit.pack(side=tk.RIGHT)

    def button_click(self):
        self.label['text'] = 'Button clicked!'
        self.label['fg'] = 'blue'

    def quit_program(self):
        self.destroy()

if __name__ == '__main__':
    root = Root()
    root.mainloop()
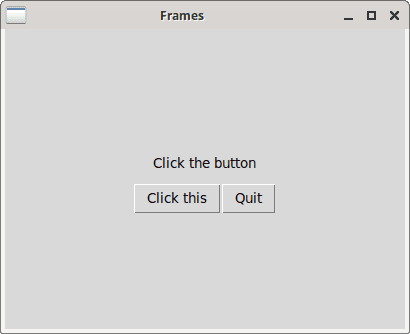
To add a widget to a particular Frame instead of the main window, pass the frame variable when you create that widget. The expand=True parameter for packing will give unassigned window area to the frame, thus resulting in centered buttons and labels in this particular example.
expandandfillparameters.
Radio buttons
The final example in this introduction section uses the Radiobutton widget.
# radio_buttons.py
import tkinter as tk

class Root(tk.Tk):
    def __init__(self):
        super().__init__()

        self.title('Radio Buttons')
        self.geometry('400x300')

        self.frame = tk.Frame()
        self.frame.pack(expand=True)

        self.label = tk.Label(self.frame, pady=10)
        self.label.pack()

        rb = tk.IntVar()
        choices = (('False', 1), ('True', 2))
        for choice, idx in choices:
            tk.Radiobutton(self.frame, text=choice, value=idx, variable=rb,
                           command=lambda: self.label.config(text=rb.get()),
                          ).pack(anchor=tk.W)

if __name__ == '__main__':
    root = Root()
    root.mainloop()
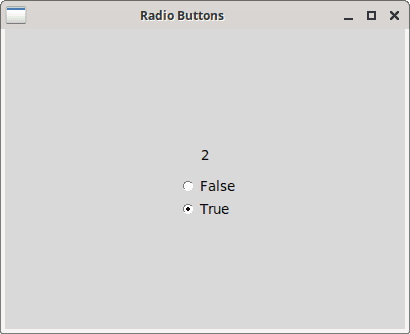
The value parameter for the Radiobutton here assigns an integer for that particular choice. This integer value associated with a choice will be assigned to the variable that you pass to the variable parameter. Integer value is used in this example, so you need to pass a IntVar() object.
The anchor parameter here places the radio buttons on the west side of the frame (default is center) relative to other widgets. This effect will be more visible in the multiple choice GUI presented in the next section.
When the user selects a choice, the integer associated with that choice is fetched using the get() method. The config() method is another way to change a widget's parameters, helpful when you are using lambda expressions. In this case, the label's text parameter is modified.
IntVar()andanchorparameter respectively.